Monday, September 12, 2011

HENRI MATISSE

The first three pictures posted here were made by my 2nd graders and are their own versions of "Polynesia, The Sea" by Henri Matisse. Prior to creating them we had an outdoor lesson using chalk which is explained further below. When we took the project indoors, one of my students made one of his shapes stand up off of his artwork. Everyone wanted to do this, and so our little Matisse replicas took on a three-dimensional quality!

NOTE: The lesson explained below occurred before the artwork posted above was made.
 The artwork above was made by Henri Matisse in 1946 and is titled, "Polynesia, The Sea".  Before I took my students outside to work with sidewalk chalk, we discussed the elements of art found within this piece.  Shape and value seemed to dominate the conversation, while visual texture was definitely included as my students imagined feeling all the different plants and critters from the sea found within the picture.
 Students chose two or three shapes to focus on while replicating them outside with sidewalk chalk.
 It didn't take long to begin filling our sidewalk squares.
 Big clouds were forming, and students knew that their hard work would soon be washed away.
 We talked about temporary art and the importance of finding enjoyment in the process.
Tomorrow we will have a brand new canvas to cover!

EGYPT

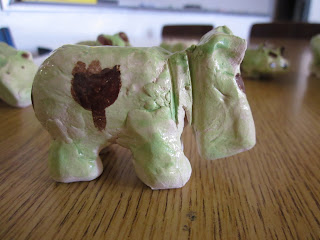
 During our unit on Egypt, we all made the very famous "William the Hippopotamus. He is the unofficial mascot of the Metropolitan Museum of Art in New York City. Between the two schools where I work, I kept track of over 200 hippos! A few heads and legs had to be glued back onto the hippo bodies after firing, but overall we had great success with this project.
Hippos were very important to the early Egyptian people for a variety of conflicting reasons that I found on multiple websites. You can read up on him and draw your own conclusions. As for me and my students we really enjoyed learning about and creating our own William.

 In the photos below, you will see our cartouche project. This was a blast for the kids because they began by learning how to write their own names using hieroglyphs and then forming a clay cartouche. They gently etched or carved their names into the wet clay, and after they were bisque fired they glazed them. The results were very impressive. We had to be extremely careful handling them before firing as they are quite thin.

 You can't learn about Egyptian art without painting the eye of Horus on authentic papyrus! This paper was ordered from "Dick Blick" in Seattle, and it was a thrill to work on. I read a blog where an art teacher made papyrus from scratch using local reed type plants, but we did not have that option.