Tuesday, April 23, 2013

OJO DE DIOS

Ojo de Dios in its beginning stage.
 This is a great project for many ages and calls for just yarn, sticks, and glue or wire.  Popsicle sticks work well, although the images posted here were made with wooden dowels.
Begin by fastening two sticks perpendicular to each other using glue, thread, or fine wire. Take a generous strand of yarn, tie it to the center of the crossed structure and begin weaving by going around the sticks clockwise or counter clockwise.
Experiment with different weaves by going over-around, under-around, or over-around, over-around. This probably won't make sense until you try it, but once you do, you'll see how easy it is.

Ojo de dios showing two different weaving patterns.
In this photo you can see two different patterns. One pattern is a repetition of over-around, and the other is a repetition of under-around.

Beautiful Ojo de Dios using only one color.
We have used multiple colors in some Ojos, but you can see that if the pattern is varied then only one color can also be effective.

Ojo de Dios with smaller ones on the tips.
Here is an Ojo de Dios that has smaller ones attached to the tips of the center Ojo. The Huichol tribe in Mexico is known for their beautiful Ojos, although it is called something else.

Wednesday, April 10, 2013

COLLAGRAPHY FOR KIDS

 In its simplest terms, a collagraph is a print of a collage. If you're going to use a press it will be best to build your collage on mat board or some other flat, sturdy material. Mat board was used for the image display here.
Unused collagraph plate with mod podge coating.
 You can use yarn, paper clips, bubble wrap, and other odd ball materials to build your collagraph, but we kept ours simple and built them using only thin cardboard. Cereal boxes and other food boxes are a perfect weight and a great way to recycle. They're thin enough for even first and second graders to cut.

Make sure to carefully glue every edge and corner so that it stays put. You can place heavy books on top to be sure. Use quality glue if you can.

 After you finish gluing your image it is important to apply a protective coat to the plate (the plate is your collagraph image on board). Mod podge or watered down glue (not washable glue!) works well for this. The coating will allow you to make multiple prints without losing pieces of the image by way of usage. 
Inked collagraph plate ready to be printed.
Ink it up with printing ink or a substitute and run it through your press. If you don't have a press, wooden spoons are the perfect tool to make your print by hand.
Collagraph plate and print.
After you are finished making all the prints you want, cover the plate with heavy foil to make an aluminum foil relief print. I will post that as a different project later on.
Different plates for collagraphs made by K's and 1st grade.
 Here are some plates that Kindergarten through Second grade made. They have not been printed but have been coated with a protective spray and are ready to go.
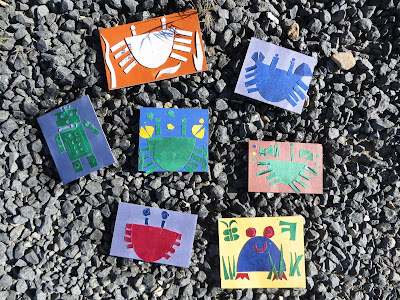
Robots!

Tuesday, April 2, 2013

SUMI-E or BLACK INK PAINTING

Sumi-e or black ink painting seems to be a very calming art project for every age.

The elegant simplicity of the natural elements and the pleasing contrast of black and white with all shades in between lend themselves to a highly satisfying painting experience.

When a classroom full of 25 energetic children is completely quiet and all are engaged, you know you've found a great project!

The paintings displayed above were made on student quality, cold press watercolor paper using diluted black India ink. In order to achieve a softer look, students first brushed clean water across their paper. After the paper had absorbed the water, they applied their brushstrokes using varying amounts of India ink. 

I have purchased specialty sumi-e brushes for my classroom, but a round #6 or #8 watercolor brush works well too.

My students and I took some time to learn about sumi-e painting before we started. It's purely fascinating, and engaging in the process allows for a deeper appreciation of the art.

WOODEN MANNEQUIN SKETCHES


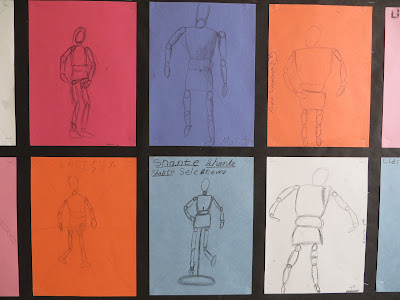
Third, fourth and fifth grade students sketched wooden mannequins that were placed at each table.

Students focused on using loose lines, and they also paid extra attention to spatial relations. For example, they asked such questions as "Where is the wrist in relation to the hip?" and so on.

Each student appeared to be open to the adventurous spirit that this assignment required. I encouraged them to employ a sense of humor, to do their very best, and to support everyone in their unique approach.

 Displayed together, students are able to appreciate the many different styles, perspectives, and approaches to this project.
EXCELLENT WORK EVERYONE!