Monday, December 12, 2011

PAPER MACHE ALEBRIJES

Finally! Here are the completed alebrijes which were designed and constructed by our 7th and 8th graders over the course of many weeks. If you look back into the "alebrijes" blog entry, you can see the different recycled materials that were used to build these creatures.
Great work, everyone!


Monday, November 21, 2011

CLAY ANIMAL RATTLES

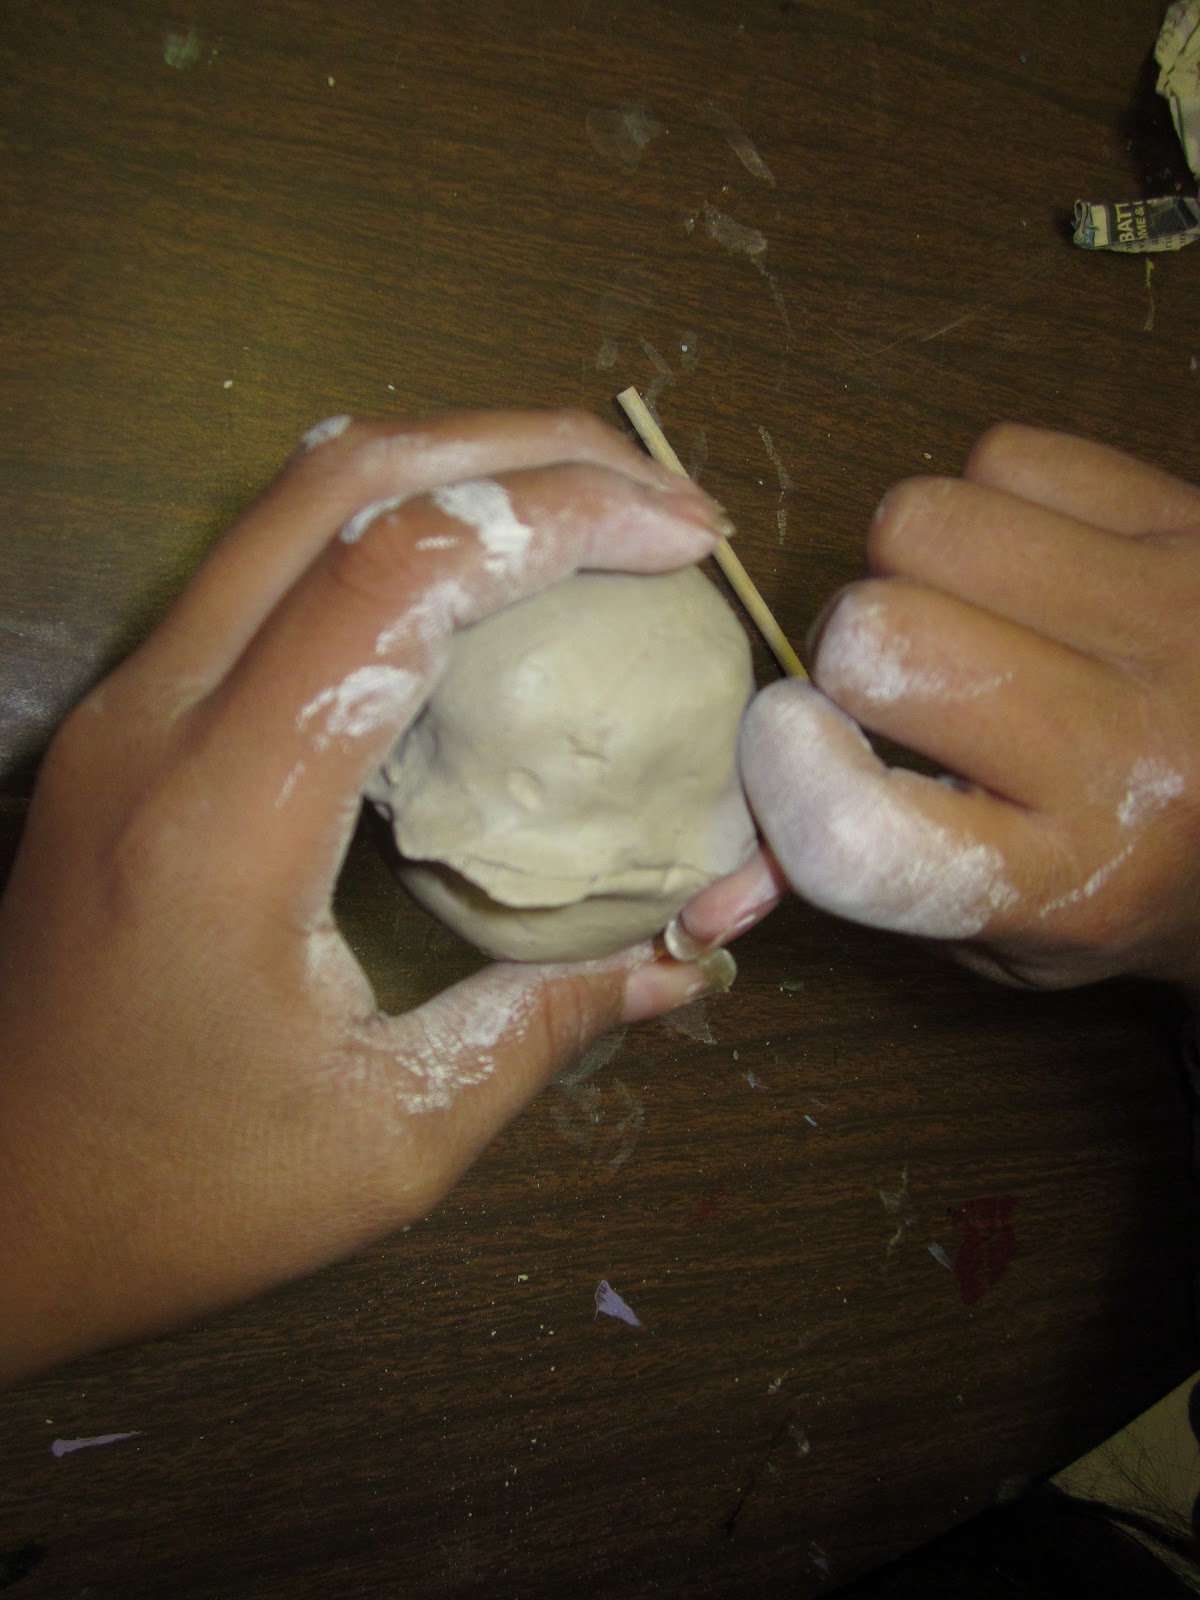
Clay animal rattles really do rattle after they've been fired! Don't forget to poke holes somewhere in your animal so the smoke can get out. See below for complete instructions.

 1) Make two pinch pots of the same size.
 
  2) Make 4 or 5 pea-sized clay balls and wrap them individually in small pieces of newspaper.
 3) Stuff the newspaper-wrapped clay balls into one of the pinch pots and join the two pots by smearing the clay together. Smooth out the sides with slip or just use your fingers.
 4) Poke a hole or two into your cylindrical, featureless creature. Eyes are a good place for holes. Use a stylus to scratch student initials and grade into the bottom.
  5) Attach the appropriate body parts for the animal you are making. (Wings, beak, ears, tail, horns)  Make sure to smear and smooth the appendages onto the animal, don't just stick them on or they'll fall off.
  

6)Allow the aminals to dry out completely before firing.
7) Apply glaze and fire again.

I recommend firing once before applying the glaze because the parts tend to be very fragile, and they often break before firing if they're handled too much.
 

Sunday, November 6, 2011

KANDINSKY'S CIRCLES

Wassily Kandinsky was a Russian artist who lived from 1866 until 1944. He is given credit for developing a purely abstract style in art.
After giving up a promising career in law, Kandinsky became a painter, an author, and a teacher at the Bauhaus School of Art in Germany.
He loved color and music, and he believed they were closely related in many ways.
Kandinsky's "Squares With Concentric Circles" is a great piece of artwork for children to imitate because it is so colorful and playful. It is also a great opportunity for students to identify and explore different color arrangements, such as using all warm, cool, analogous, or complementary colors within a square. For this project we used oil pastels and watercolor while listening to classical music.

Here is our drying rack full of colorful circles! And when you look at the photo below, you may experience a sudden sweep of cheer and laughter brought on by the power of many colorful circles displayed in one place! I know I did!

Monday, October 24, 2011

TEXTURE!

Today we learned all about texture. I started the lesson by playing hangman with my students. They LOVE to play hangman, and the word texture is an excellent hangman word because it is tough to figure out.
 In order to distinguish between tactile and visual texture, each student reached into a bag to feel a mystery item. After each student felt the mystery item, we made a list of words to describe how the item felt.
Then, before seeing what was in the bag, students were invited to guess what it was. Students were able to see that just by touching something, they were able to describe and identify it. 
 After exploring the mystery bag, I held up different items and asked my students to describe how they thought the items would feel if they could touch them. This was fun for them, and the adjectives came easily. Soft, hard, fuzzy, smooth, rough, bumpy.
Through these two activities, students were able to process and comprehend the difference between visual and tactile texture.

 The next activity was to create a texture chart based on the items on display. Students started by folding a piece of paper three times to make 8 boxes in which they would paint their different textures.
Then they started filling their boxes with a variety of brushstrokes to represent the textures of the different items on display.

This project works well for all grades in elementary school. Adults love it too!
The results of the finished charts are impressive and refrigerator worthy!

PICASSO INSPIRED SELF PORTRAITS


Monday, October 10, 2011

SKULLS/MEXICO

Last year for Dia de los Muertos my 6th, 7th, and 8th graders made colorful skulls. We talked about the significance of the Mexican holiday, and we compared Halloween and Dia de los Muertos to see what differences and similarities we could find. We also looked at different skulls on-line to gain inspiration for our own creations.


The first step in building our skulls was to paper mache a balloon. Make sure to check the size and shape of your balloons ahead of time. I had one class where each student received a balloon that could be blown up to the size and shape of a basketball! The ideal shape is oval, and the size is up to you.

After the paper mache balloon dried completely, we poked holes into the areas where we wanted to insert egg carton cups (I'll use the word "cup" for lack of egg carton terminology) for eyes and a nose. If you look carefully, you can see the egg carton insertions in the first photo. You can also see where we taped egg carton cups for the cheek bones. Below the cheek bones you can see where we taped thin, pre-cut cardboard pieces for the jaw.

After the paper mache completely dried, we applied a coat or two of white gesso to strengthen our skulls. White acrylic paint works, too.

Then we painted our skulls using fun colors and playful designs. Before we put our skulls on display, we made tissue paper flowers. If you have ever been to a Dia de los Muertos celebration, you know that marigolds are in important part of the holiday tradition as they help to guide the spirits.

If you look carefully at the pink and purple skulls in the photo below you can see a shiny glitter coat that some students applied to their completed skulls. Excellent work, everyone!

Saturday, October 8, 2011

HOPILAND INSPIRATION

The photographs displayed here are from "Indian Day" at the school where I teach. Indian Day is held each year in September, and it's my favorite day of the school year. An entire day is devoted to a variety of dances performed by students and staff for parents and the community.
Living on the Hopi reservation fills one's imagination with an endless array of inspiration from which to draw upon while making art.  Different ceremonies are held throughout the year, and the colors, textures, and designs on display are enough to fuel a lifetime of potential artistic expression. Anytime I go for a simple walk in the village or the desert, I come home with a head full of project ideas. It's just a matter of engaging in the creative process in order to bring those ideas to life. Sometimes this doesn't happen as often as I would like!


Hopi culture is so rich in many ways. The children grow up immersed in such incredibly layered traditions, and they come to art class brimming with creative potential. I love sharing art from around the world with them and watching them integrate their own cultural impressions into their art projects.

Tuesday, September 13, 2011

ALEBRIJES/MEXICO

 My 7th and 8th graders are learning about the famous Mexican artist Pedro Linares Lopez and his paper mache fantasy creatures known as Alebrijes. Last week they designed their own two-dimensional alebrije on paper, and this week they built three-dimensional armatures which will be covered with paper mache next week. After the paper mache has completely dried, they will paint their alebrijes with bright paint and fanciful patterns.
 I was amazed at the eagerness and ingenuity that my middle school students displayed during the building stage of this project. It's incredible what one can build with cracker boxes, frozen juice containers, and toilet paper tubes!

                                         Check out these legs...dish soap bottles!
A whole entire egg carton for this creature's mouth.  

The photo posted above is one that was taken in Mexico City during an annual parade which features alebrijes and is in memory of Pedro Linares. Check back in soon for our completed alebrijes.

Monday, September 12, 2011

HENRI MATISSE

The first three pictures posted here were made by my 2nd graders and are their own versions of "Polynesia, The Sea" by Henri Matisse. Prior to creating them we had an outdoor lesson using chalk which is explained further below. When we took the project indoors, one of my students made one of his shapes stand up off of his artwork. Everyone wanted to do this, and so our little Matisse replicas took on a three-dimensional quality!

NOTE: The lesson explained below occurred before the artwork posted above was made.
 The artwork above was made by Henri Matisse in 1946 and is titled, "Polynesia, The Sea".  Before I took my students outside to work with sidewalk chalk, we discussed the elements of art found within this piece.  Shape and value seemed to dominate the conversation, while visual texture was definitely included as my students imagined feeling all the different plants and critters from the sea found within the picture.
 Students chose two or three shapes to focus on while replicating them outside with sidewalk chalk.
 It didn't take long to begin filling our sidewalk squares.
 Big clouds were forming, and students knew that their hard work would soon be washed away.
 We talked about temporary art and the importance of finding enjoyment in the process.
Tomorrow we will have a brand new canvas to cover!